Microsoft Windows 10 and 11 users sometimes encounter issues where the caps lock appears stuck or the caps lock indicator fails to turn off despite pressing the caps lock button multiple times. This occurrence might seem peculiar, but it’s not necessarily a glitch. Fortunately, resolving the caps lock indicator issue in Windows 10 and Windows 11 is achievable by following the steps outlined in this article.
These steps will guide you through troubleshooting and resolving the caps lock indicator issue, ensuring smooth functionality of your keyboard settings.
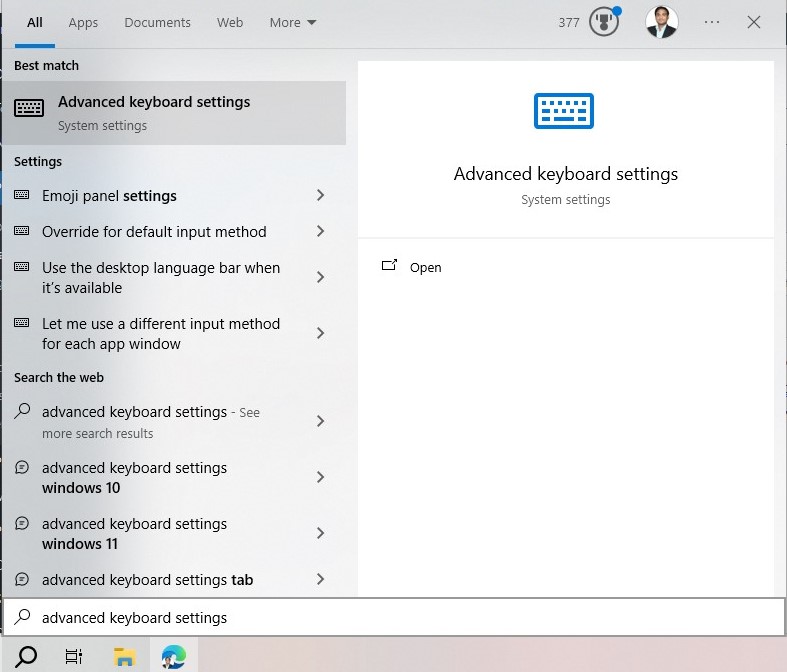
Step 1 – Go to Windows Search
The first step is to search. Simply press the Windows key and type “advanced keyboard settings” in the search bar.

Step 2 – Open Advanced keyboard settings
Open the advanced keyboard settings by clicking on the “Open” option, as shown in the aforementioned setup.

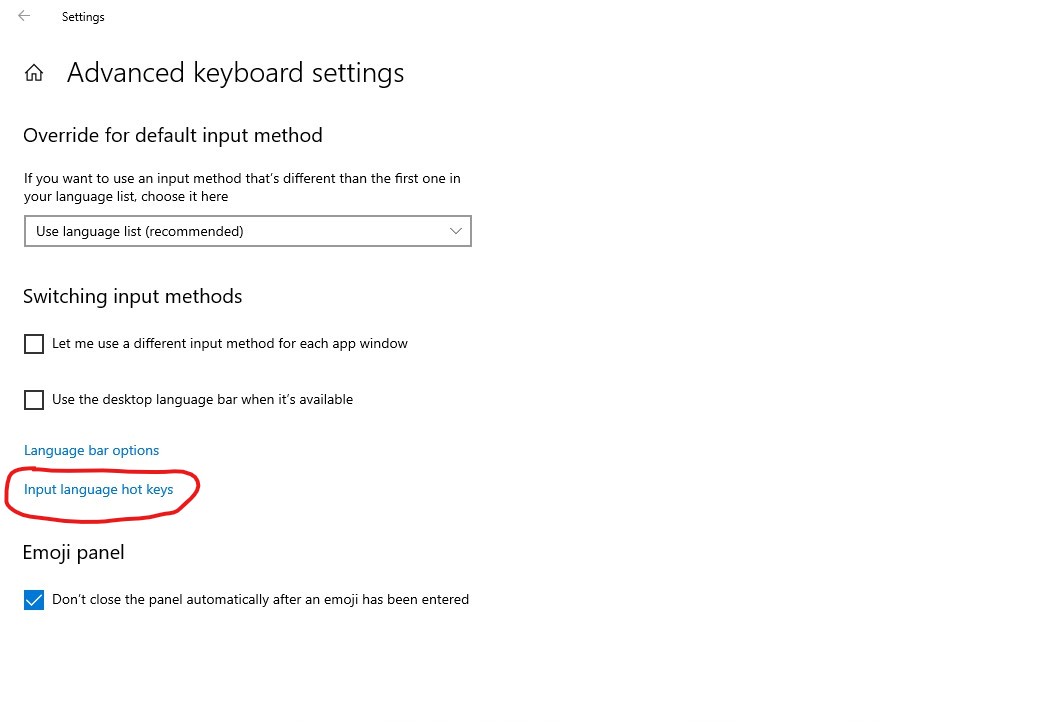
Setup 3 – Open Input language hot keys
As highlighted in the previous setup screenshot, click on “Input language hot keys” to open the input language hotkeys settings.

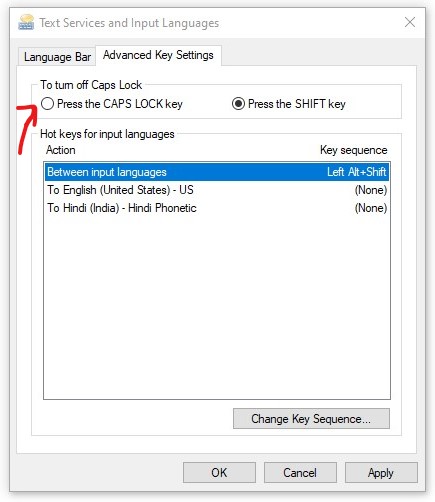
When clicking on ‘Input language hot keys,’ Text Services and Input Languages in Windows will open. Within the Text Services and Input Languages window, click on the Advanced Key Settings tab. In the Advanced Key Settings tab, enable the ‘Press the CAPS LOCK key‘ radio button and click on the Apply button.
This will fix the issue. If the issue still persists, try using the On-Screen Keyboard to diagnose the issue. You can use an external keyboard or a different keyboard to check; it may be possible that there is a keyboard issue.


