Microsoft Windows is the widely used Personal Computing Operating System designed to support a variety of hardware and provide an ease of usage to its users. Windows is known for its user-friendliness, clean design and DYI features, but in other hand it is very costly especially when you are going to use it for education and personal purposes. In this article we will learn, how to get Microsoft Windows Virtual Private Server or VPS with Remote Desktop Connection and that’s free of cost. Whether you are looking for the Windows VPS Server to host a Game, launch a website, test software or setup any other stuffs it is going to work for everything.
Things You’ll Need:
- Visa/Master/American Express Debit/Credit Card (Don’t worry you won’t be charged)
- Email address
- Basic Knowledge of Microsoft Windows and Port-forwarding
How to Get Free Windows VPS in India for free?
There are thousands of websites on the Internet that are claiming to offer you a free Windows VPS server, but most of them turn outs to be the scam when it comes to the actual implementation, but here we are going to use the services of one of the most reputed company in the World i.e. Amazon. That’s right, in the year 2006 Amazon launched Amazon Web Services popularly known as AWS to serve on on-demand cloud services including Hosting, Email Solutions, Content Delivery Network (CDN) and of course the Virtual Private Servers (VPS) to individuals, cooperates and government.
Most of the services offered by Amazon under the band name Amazon Web Services does comes with free trail plan with a validity of 1 year known as free-tier — You can find more on AWS Free tier services here : aws.amazon.com/free
In order to get Microsoft Windows VPS servers for free of cost:
- Simply, Setup an account for free from aws.amazon.com
- Add your Credit/Debit card (Note: AWS may charge you $1 to verify you Card which get refunded/adjusted later on)
Once you have successfully created your account, login into your AWS Account:
- Click on the Services option given at the navigation
- Under Services option click on the EC2
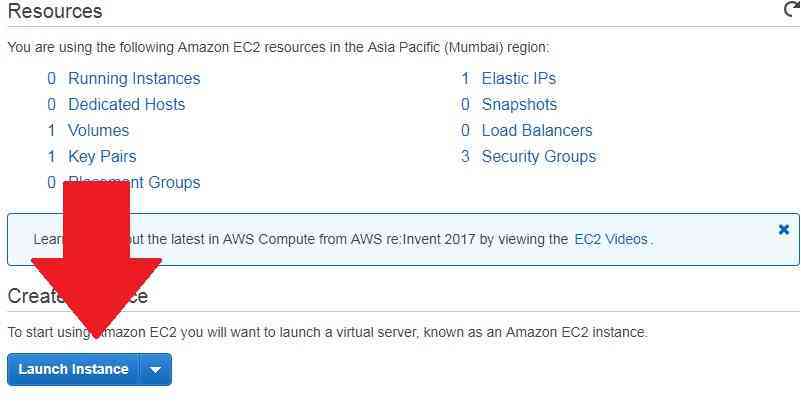
- On the EC2 Management Console Page, click on the Launch Instance button
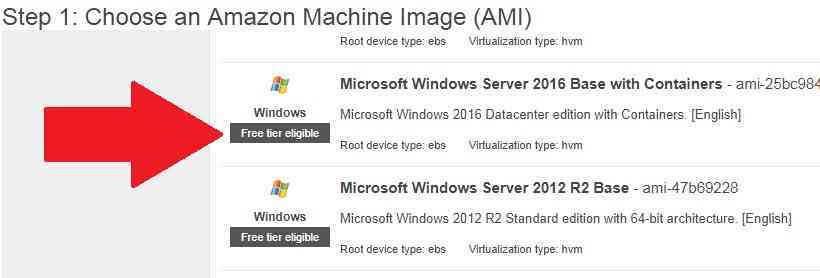
- On the “Step 1: Choose an Amazon Machine Image (AMI)” page select the Free tier eligible Microsoft Windows Server 2016 or Microsoft Windows Server 2012
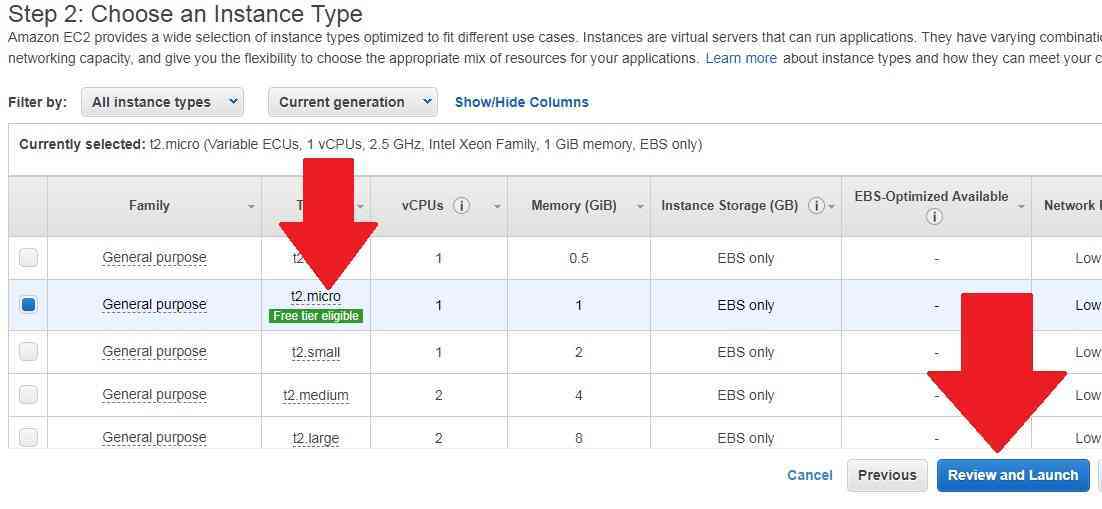
- On the “Step 2: Choose an Instance Type” page, select General purpose t2.micro Free tier eligible and click on the Review and Launch button
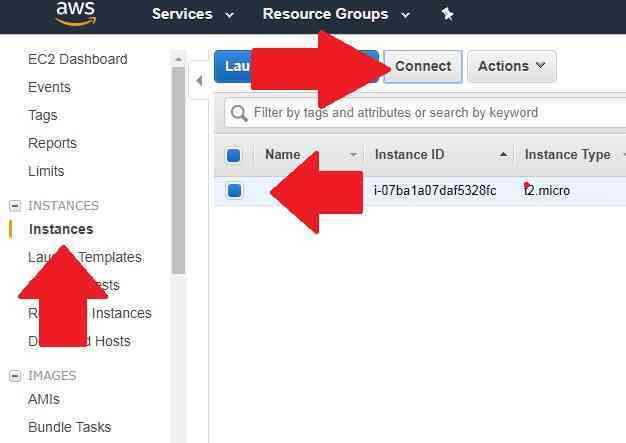
It may take several minutes to Initialize and Setup the Instance and once it has been successfully initialised, select the instance that you have created from the instances and click on the Actions buttons and click on Connect Button
In the Connect to Instance Pop up window, download your remote desktop file by click on the Download Remote Desktop File and Generate the Password by clicking on Get Password button using Key.
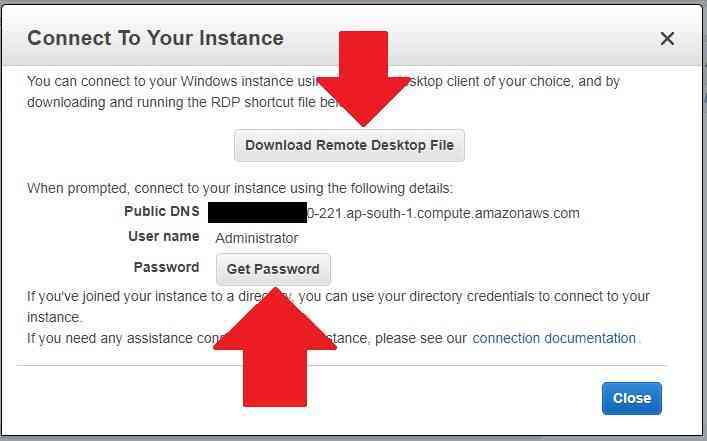
Once you have successfully Generated the password use the Public DNS or the Remote Desktop file to connect your Windows VPS with the help of Microsoft Windows Remote Desktop connection application. You can launch the Remote Desktop connection by typing mstsc in the run.

